
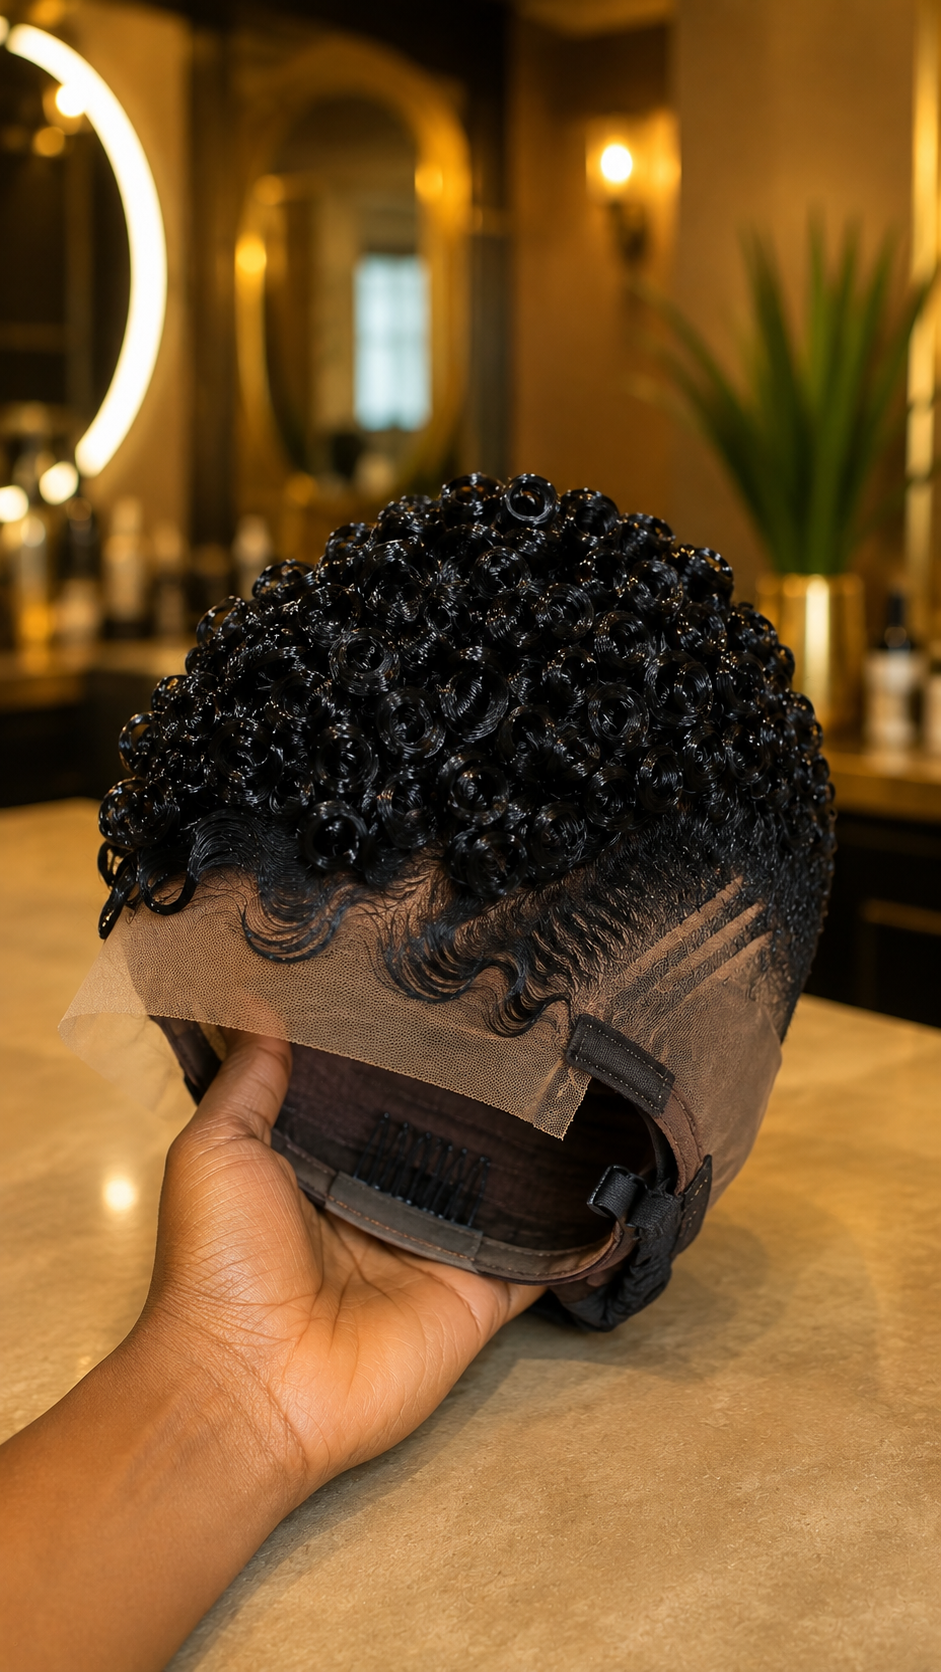
There is a small construction line on this black curly pixie that matters far more than most buyers realize. Follow the lace from the front toward the side and eventually the transparent mesh stops. A darker, stronger cap material takes over.
That meeting point is the lace-to-cap junction.
On a long wig, the surrounding hair may cover it completely. On a short sculpted pixie with exposed temples, a faded side, and carved lines, the transition has almost nowhere to hide. If it sits too far forward, is too bulky, or creates a visible step beneath the short hair, the wig can look convincingly realistic at the forehead and noticeably constructed only a few centimeters away.
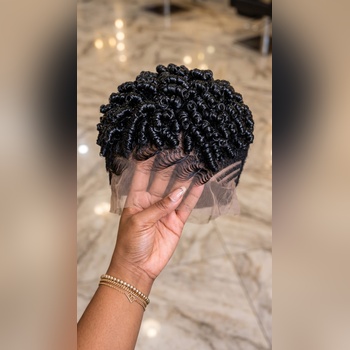
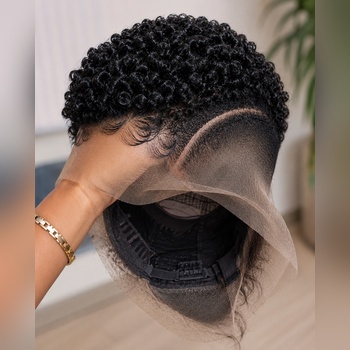
A good lace-front pixie therefore needs more than beautiful lace at the center. The lace has to stop in the right place, and the material that replaces it has to disappear into the design.
Where To Buy A Pixie Wig With A Clean Lace-To-Cap Transition
Custom wig makers.
A custom maker is one of the best options when the side of the wig will remain exposed. Ask to see the unfinished or untrimmed unit from the temple angle. You want to know where the lace ends before the styling hides the construction.
Instagram and TikTok sellers.
Request a slow side-profile video rather than another front beauty shot. Ask the seller to hold the lace outward slightly so the boundary between the lace and cap fabric can be seen clearly.
Etsy.
Independent wig makers may offer more control over cap dimensions, frontal width, temple placement, and side construction. Ask how far the frontal extends toward the ear and what material begins after it.
Marketplaces like Amazon, AliExpress, and Temu.
Product photos often emphasize the frontal. Customer images may reveal whether the side seam sits farther forward than expected or creates bulk around the temple.
Local beauty supply shops.
A physical inspection is particularly useful for this issue. Turn the wig sideways and locate the exact point where the transparent mesh stops. Press that junction lightly between your fingers and feel whether it creates a thick ridge.
Wig salons.
A stylist can tell you whether the side seam will fall inside the hairstyle or directly inside a highly visible short section. That distinction is difficult to judge from a straight-on listing image.
Direct vendors and wholesalers.
If you buy multiple units, request interior and side photographs from the current batch. A frontal width listed in inches does not automatically tell you how cleanly the lace has been attached to the surrounding cap.
Human-hair wig specialists.
Human hair may allow more styling freedom around the junction, but the underlying construction still matters. More expensive hair does not automatically mean a better side seam.
Premium synthetic sellers.
Synthetic units can sometimes hide a junction effectively because the short side is pre-shaped to sit exactly over it. Check whether the design still works if the hair moves slightly out of its original factory position.
Regional sellers.
Whether you are buying from Lagos, Accra, Atlanta, London, or a major South African hair market, use photographs rather than relying only on terms such as frontal, lace front, temple lace, or extended frontal. Sellers may use those labels differently.
Vet the seller.
Favor sellers who show the underside. A serious product listing should make it possible to understand what you are buying beneath the curls, not only above them.
Red flags.
Be cautious if the side seam is extremely thick, sits directly in the visible temple zone, produces a hard ridge under the cropped hair, or is hidden in every seller photo.
When you order, send.
Provide your cap measurement, desired side profile, temple coverage preference, and a close reference showing where you want the cropped side and lace transition to sit.
Contact / order inquiries: WhatsApp [WhatsApp: +XX XXX XXX XX XX]
How Much It Costs
Premium custom human hair.
A carefully constructed short human-hair pixie with refined lace, individually styled ringlets, clean side transitions, and detailed cap work can commonly fall around $240–$460 depending on hair quality and customization.
Standard custom human hair.
Around $180–$320 can cover many good short units. At this level, examine construction photographs rather than judging the difference only by hair grade.
Basic human hair.
Around $150–$240 may buy a simpler lace-front cap where the frontal-to-cap transition uses heavier fabric or more visible reinforcement.
Good synthetic.
Around $60–$150 can provide a convincing short pixie if the pre-shaped side covers the junction effectively and the cap sits correctly.
Basic synthetic.
Around $25–$70 is common for budget units. The biggest compromise may not be the curls. It may be thicker lace, heavier seams, or more generic cap construction.
Extended lace areas.
A wider frontal or more extensive lace construction may increase cost because more of the visible perimeter requires finer material and additional ventilation work.
What the price may exclude.
Custom measurements, lace tinting, knot work, temple customization, side reinforcement, colour, and professional installation may all be separate.
Shipping and duty.
International shipping, customs fees, and local taxes can increase the real purchase price. Compare the delivered total rather than only the listing price.
Ongoing costs.
The side seam itself should not require routine maintenance, but repeated aggressive stretching, adhesive removal, or pulling near the junction can eventually stress the surrounding lace.
First-year total.
Include lace care, curl products, possible professional fitting, and any repair needed if the junction begins separating from the cap.
Cost per wear.
A slightly more expensive unit with a cleaner side transition may deliver better long-term value than a cheaper wig that always needs strategic edge styling to hide its construction.
What a very low price may signal.
It can indicate thicker reinforcement, shorter lace coverage, mass-produced cap dimensions, or a junction designed to be covered by hair rather than exposed.
Deposit structure.
Custom makers commonly request around 30–50% upfront and the remainder before dispatch. Ask to approve a side-view photograph before the final payment when possible.
Shipping, Delivery, And What To Expect After Ordering
When the wig arrives, examine the junction before cutting the lace.
Hold the frontal gently away from the cap and identify where the fine mesh changes into thicker fabric. Do this on both sides.
The two junctions do not need to be microscopically identical, but they should sit in sensible corresponding positions.
Then put the unit on without adhesive and check where those points land relative to your temples and ears.
This is important because a junction that appears hidden on a mannequin may become much more visible on a head with different proportions.
The Best Junction Sits Inside A Low-Visibility Zone
The easiest way to hide a construction change is to place it where the hairstyle already contains visual complexity.
On a short curly pixie, that may be beneath a denser curl, behind a temple transition, or inside the area where fuller crown hair begins moving toward the cropped side.
The worst location is usually a completely exposed smooth section.
If a thick seam runs through a very short fade with almost no hair above it, your eye has a clear surface on which to notice the change.
Construction placement therefore works together with haircut design.
The maker is not only building a cap and then adding a hairstyle. Ideally, the cap is built so the hairstyle naturally conceals the necessary structural transitions.
Lace And Cap Fabric Behave Differently
Fine lace is designed to disappear visually.
It is thin, flexible, and semi-transparent.
Cap fabric has a different job.
It needs to provide structure, hold seams, support combs or straps, and survive repeated stretching.
That usually means it is stronger and more opaque.
When those two materials meet, there will naturally be a change in thickness and flexibility.
The goal is not pretending the junction does not exist.
The goal is making the change gradual and strategically placed enough that it does not become part of the visible hairstyle.
A Thick Reinforcement Can Create A Ridge
Some junctions include extra stitching or a reinforced strip.
That reinforcement may improve durability, which is useful.
But durability can create bulk.
If several layers of material are stacked at the same point, the seam can form a ridge beneath very short hair.
On a dense long wig, nobody may ever notice.
On a pixie, the ridge can subtly change the contour of the temple.
View the unit from the side under directional light. Light catches raised surfaces and makes small construction bumps easier to see.
If the side should look close to the scalp but one small section projects outward, inspect what sits underneath before blaming the haircut.
The Junction Should Not Interrupt The Fade
This wig contains a very short sculpted side with carved parallel lines.
That kind of side styling depends on a continuous visual surface.
If the lace-to-cap junction creates a sudden change in thickness exactly halfway through the fade, the side may appear divided into two sections even though the hair lengths are correct.
A good construction allows the fade to read continuously.
The viewer should notice the transition from curls to short hair, not the transition from one cap material to another.
This distinction becomes especially important when the side design itself is graphic.
Carved lines already attract the eye toward the temple. Any construction problem in the same area receives extra attention simply because the viewer is already looking there.
Compare Both Sides
Do not assume that because one side looks good, the other automatically does too.
Wig construction is symmetrical in principle but can vary slightly through hand sewing, material tension, and assembly.
Check where the lace stops on the left.
Then check the right.
If one junction sits significantly farther forward, the side silhouettes may behave differently once the wig is installed.
This matters even more when one side of the hairstyle carries more design detail than the other.
A seller may repeatedly photograph the stronger side.
Ask for both.
A Wider Frontal Moves The Junction Back
One way to reduce visible side-transition problems is using a frontal that extends farther toward the ears.
More lace means the lace-to-cap junction is physically moved away from the central forehead and farther around the side.
That can provide a more continuous scalp-like surface around the temple.
But more lace is not automatically superior.
Fine mesh is usually more delicate than sturdy cap fabric.
Moving the junction backward increases the amount of fragile material being used.
There is therefore a trade-off: more lace can improve visual continuity while increasing delicacy and potentially cost.
Choose according to the hairstyle.
A short exposed pixie benefits more from useful side lace than a style whose temples will always remain covered.
More Lace Does Not Help If The Seam Is Poor
It is easy to focus on frontal size.
13×4. 13×6. Extended frontal. Ear-to-ear lace.
Those measurements can be helpful, but they do not tell you how cleanly the lace has been joined to the rest of the cap.
A large frontal with a bulky seam can still produce a visible transition.
A slightly smaller frontal with careful low-profile stitching may look cleaner in the actual hairstyle.
Ask for both dimensions and construction photos.
Numbers describe coverage.
They do not describe craftsmanship.
The Junction Is A Stress Point
Any place where two materials are joined becomes an area worth handling carefully.
The lace is softer and finer.
The cap material is stronger.
When you repeatedly pull the wig by that exact meeting point, the difference in material strength can concentrate stress along the stitching.
Try not to grip the unit by one side seam every time you put it on or remove it.
Support a broader section of the cap.
This distributes force rather than repeatedly loading one small construction point.
Adhesive Should Not Be Used To Hide A Bad Junction
Installation can improve how lace sits against the skin.
It cannot relocate the seam.
If the junction is structurally too far forward and highly visible, adding more glue or gel does not fundamentally correct the problem.
You may flatten it somewhat, but you are still working with an unfavorable placement.
The better solution is identifying the issue before altering the unit.
This is why the try-on stage matters.
A pixie has limited room for improvisation after the lace has been cut.
Lace Tint Can Reveal The Boundary If Only One Material Changes Colour
Tinting introduces another subtle issue.
Lace absorbs or holds tint differently from opaque cap fabric.
If you dramatically darken the frontal but the material immediately behind it remains a noticeably different tone, the junction can become easier to identify rather than harder.
Use tint only where needed and judge the entire side after application.
The aim is visual continuity across the visible area, not simply making the frontal darker.
The Shorter The Hair, The More Important The Seam
Hair length acts like camouflage.
Longer side hair can move over construction.
Short cropped hair cannot.
That is why the exact same cap might work beautifully beneath a bob but become much harder to hide when converted into a barber-inspired pixie.
When shopping for very short wigs, construction quality should rise in importance as hair length falls.
The less hair available to cover the base, the more work the base itself has to do.
Seller Photos Should Include The Underside And Side Profile
For this specific issue, two photographs are more valuable than ten front portraits.
First: an inside view showing the lace-to-cap seam.
Second: a true side profile showing where that seam sits beneath the finished hairstyle.
Those two images connect construction with appearance.
An underside photograph alone tells you how the wig is built but not whether the hairstyle hides it.
A side photograph alone shows the finished result but may conceal what is underneath.
Together, they let you judge whether the design and construction were planned as one system.
The Junction Should Stay Flat During Movement
A seam can look perfect while the wig sits motionless on a mannequin.
Real wear involves head movement.
If possible, ask for video.
Watch the temple while the mannequin or wearer turns from front to side.
The junction should not suddenly lift, buckle, or create a visible flap.
This is especially useful on glueless units because there may be less adhesive holding every millimeter of lace flat.
Good fit and low-profile construction become more important.
Repair Is Easier Before The Lace Tears
If stitching begins loosening where the lace joins the cap, address it early.
A few failing stitches are a small repair.
A torn piece of lace extending into ventilated hair is a much more complicated problem.
Do not repeatedly pull the separating materials apart to inspect them.
If you see a developing gap, take clear photographs and contact the seller or an experienced wig repair specialist.
For custom pieces, ask before purchase whether seam repair is offered.
Before You Pay
- Can you show me exactly where the lace ends and the regular cap material begins on both sides?
- Does that junction sit underneath hair, or will it be visible inside the short temple area?
- Can you send a true side-profile video of the exact unit rather than only a front photograph?
- Is the lace-to-cap seam reinforced, and does that reinforcement create any noticeable thickness?
- If the seam begins separating during normal use, do you offer repair or remake service?
Trimming The Lace
Do not confuse the outer lace edge with the lace-to-cap junction.
The outer edge is the excess mesh that may eventually be trimmed around your hairline.
The junction is part of the construction and should not be cut through casually.
Place the wig correctly and identify both before using scissors.
Trim the external frontal lace gradually, following the intended hairline.
As you approach the temple, slow down.
The side often contains less excess material and sits much closer to permanent seams, short ventilated hairs, and structural reinforcement.
Do not continue cutting backward simply because you still see lace. Some of that mesh may be part of the designed side construction.
If you are unsure where removable lace ends and permanent structural lace begins, stop and ask the seller or use a professional stylist.
A short pixie gives you very little margin for repairing an aggressive side cut.
Search Terms
black curly pixie wig side seam · lace to cap transition pixie wig · lace front pixie temple construction · black ringlet lace wig cap seam · short curly wig side junction · glueless pixie wig lace transition · carved side lace front pixie · pixie wig frontal cap construction
Final Thoughts
The lace-to-cap junction is one of those details nobody notices when it has been done well. The frontal appears to melt at the front, the cropped side flows naturally toward the ear, and the viewer never thinks about where one material ended and another began.
That invisibility is the goal.
On a very short pixie, inspect the side of the cap with the same attention you give the front hairline. Fine lace can create a beautiful first impression, but the construction still has to transition into stronger cap material somewhere. Where that happens — and how cleanly it happens — can decide whether the realism continues around the head or stops at the temple.