
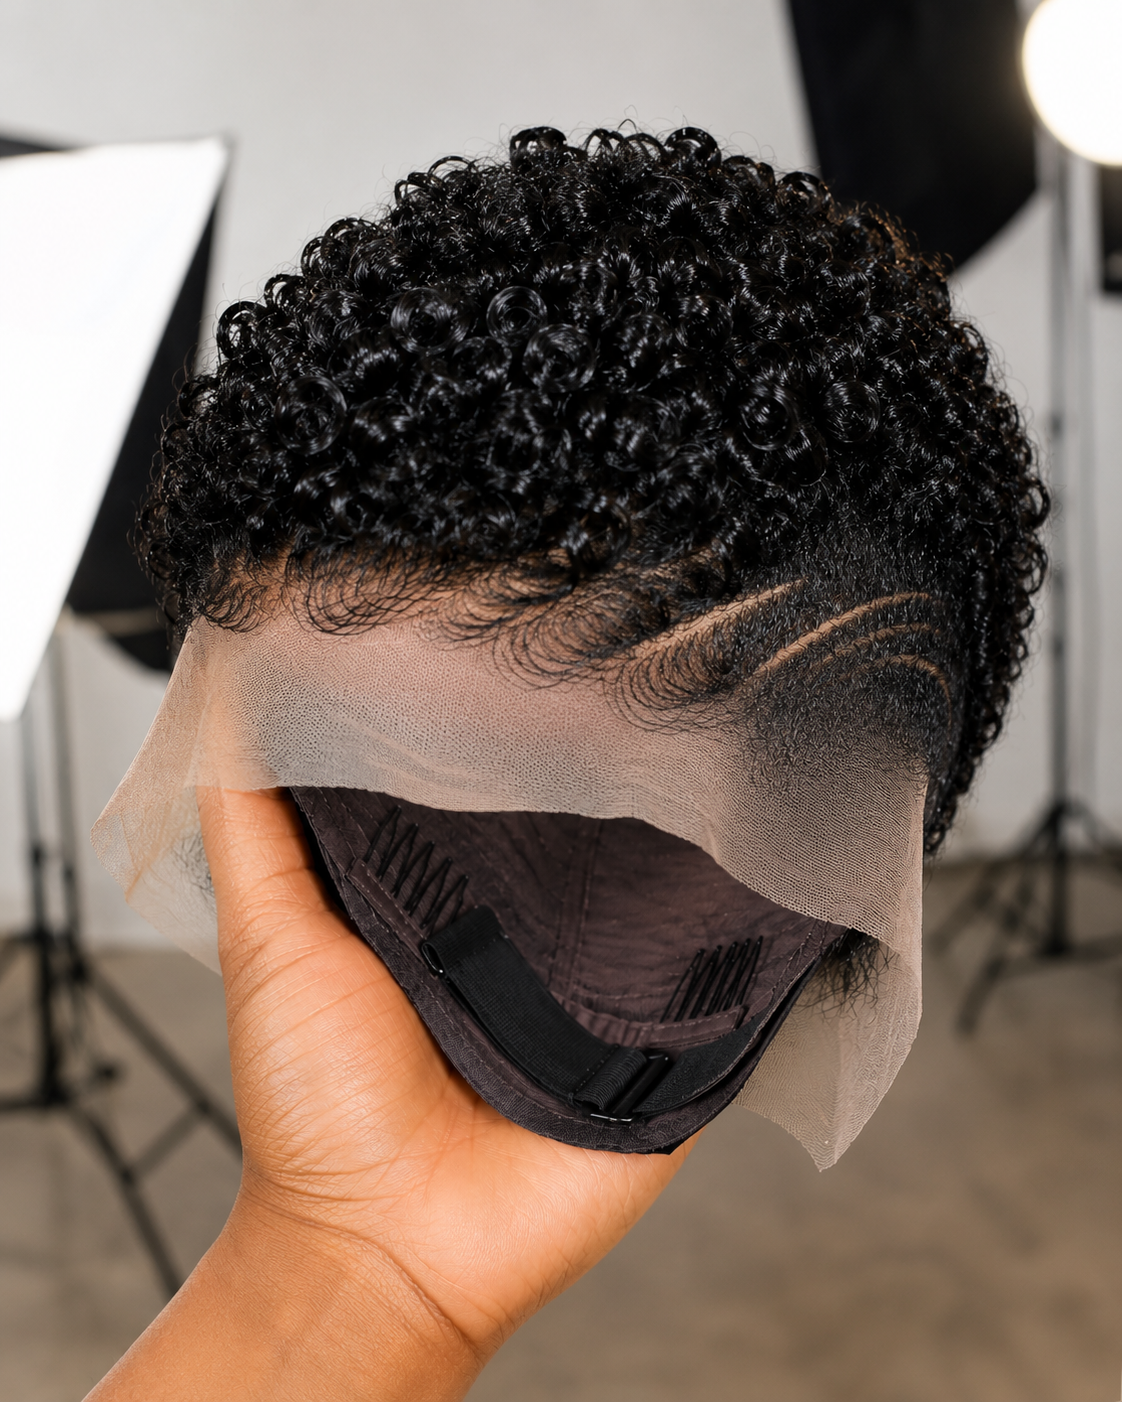
Photographed while being held open, this short pixie unit reveals far more than a standard mannequin shot ever could. The crown is packed with compact, glossy finger coils. The front is finished with thin, carefully shaped baby hairs, while the side carries a tapered effect interrupted by two curved design lines. Below all of that sits a wide section of untrimmed lace, a structured cap, several internal combs, and an adjustable fastening system.
That open-cap view matters. A finished hairstyle can hide weak construction, but the interior shows how the unit is expected to stay in place, how much lace the buyer receives, and whether the wig is built for adhesive-free wear.
The strongest feature here is the balance between the dense coiled crown and the highly detailed temple area. The curls provide fullness without creating a tall silhouette, while the carved lines and laid hairline make the side look closer to a freshly finished barbered pixie cut. Reproducing all three elements on one wig requires more than selecting the correct curl pattern. The maker must control the crown density, ventilate the shorter side area, shape the front hairline, and place the curved lines so they remain visible when the unit is worn.
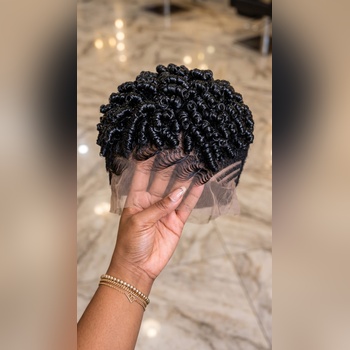
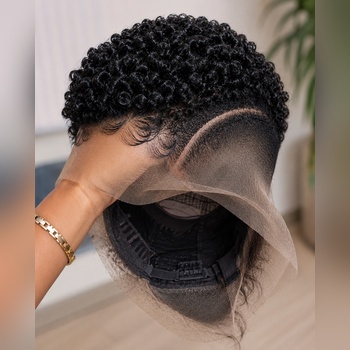
Where To Buy A Wig Like This
A ready-made listing may offer the general curl pattern, but the sculpted hairline and twin curved lines make this better suited to a custom order.
Start with independent wig makers who regularly produce short human-hair pixie units, particularly makers whose portfolios include faded sides, finger coils, barber-style details, and close-up lace work. Search their pages for interior cap photographs as well as finished model images. A maker who openly shows comb placement, straps, lace width, and knot work is giving you more useful information than one who only posts heavily styled front views.
Instagram and TikTok are particularly useful for this category because many short-wig specialists upload styling videos. Look for clips showing the unit before installation, during edge shaping, and after the sides have been finished. Video can reveal whether the coils spring back after being touched or simply hold their shape because they are coated with product.
Etsy may also work for made-to-order versions. Use filters carefully and read descriptions rather than relying on the first photograph. Some listings combine a custom-looking display image with a basic machine-made product. Buyer-uploaded photographs are often more valuable because they show the actual lace shade, curl size, side density, and cap construction under ordinary lighting.
Useful search phrases include:
- “finger coil pixie wig with curved lines”
- “short curly fade lace wig human hair”
- “glueless coily pixie wig with baby hairs”
- “barber design pixie wig for women”
- “HD lace short coil wig with combs”
- “custom tapered pixie wig with side lines”
When contacting a maker, send both the full image and a cropped close-up of the temple. The curved design can easily be overlooked when the entire wig is shown in one frame.
Contact / Order Inquiries
WhatsApp is commonly used by independent wig makers for custom consultations.
[WhatsApp: +XX XXX XXX XX XX]
Send the reference image and ask:
“Can you reproduce the compact finger-coil crown, sculpted front waves, tapered temple area, and two curved side lines shown in this photo?”
Avoid asking only whether they can make a “curly pixie wig.” That description is too broad. A seller may confirm the order while planning to provide a basic short curly unit without the detailed hairline or barber-style side work.
Request recent examples of similar pieces. Ideally, the maker should provide:
- A front hairline close-up
- A side view showing previous line designs
- An interior cap photograph
- A short movement video of the curls
- The available lace tones
- The cap circumference
- The expected production time
Also ask whether the photographed styling is completed before shipping or whether the buyer must create the coils and edges after delivery. Some units arrive fully styled, while others arrive damp, lightly curled, or only partially finished.
How Much It Costs
The jet-black colour avoids the expense of lifting and toning, but this is not a basic black pixie. Most of the added cost comes from the hairline, short side ventilation, curved line placement, curl preparation, and glueless construction.
Typical ranges may look like this:
- 100% human hair, fine lace, customised cap, hand-finished finger coils, sculpted baby hairs, tapered sides, twin curved lines, internal combs, and adjustable fastening: approximately $220–$460
- 100% human hair with a similar coiled crown but simpler edges and only one basic side line: around $160–$330
- Human-hair short curly wig with standard lace, machine-built cap, and no detailed temple work: roughly $85–$200
- Higher-grade synthetic fibre with custom curl shaping and side detailing: commonly $65–$155
- Basic synthetic short curly pixie with a standard cap: often $25–$65
A lower price does not automatically mean the unit is unusable. It usually means one or more labour-heavy details have been removed. The wig may have a denser factory hairline, printed-looking baby hairs, a simpler cap, fewer hand-ventilated sections, or no genuine barber-style design at the temple.
The side work deserves special attention. On natural hair, a stylist creates curved lines by cutting into short growth. On a wig, the maker must build and arrange the fibre so that the contrast resembles a carved line. That process can be slow, especially when the surrounding taper is hand-knotted rather than clipped from a uniformly dense base.
Ask for a complete quote that includes customisation, cap sizing, shipping, and any additional styling fee. A low starting price can rise considerably once lace selection, edge work, density changes, and line details are added.
Shipping, Delivery, And What To Expect After Ordering
A custom version should not be treated like a same-day warehouse product. The curl setting alone is manageable, but the short side construction and hairline work increase production time.
A realistic made-to-order window is often two to five weeks, depending on the maker’s queue and how much of the unit is hand-finished. Complex cap sizing or a fully ventilated side section may take longer.
The lace will usually arrive untrimmed. The wide lace visible in the photograph is not a flaw. It gives the installer room to position the unit according to the buyer’s natural hairline before cutting.
Before paying, confirm:
- Whether processing time begins immediately or after hair materials arrive
- Whether shipping includes tracking
- Whether customs charges are the buyer’s responsibility
- Whether the wig is shipped fully dry and styled
- Whether the curls are protected during packing
- Whether custom orders can be returned or altered
- Whether a cap-size correction is available if the fit is wrong
Custom wigs frequently have limited return rights because the lace tone, measurements, density, and styling may have been selected for one buyer. Keep screenshots of the agreed specifications and request the final approval video before dispatch.
The Compact Finger-Coil Crown
The crown uses small, rounded coils placed closely enough to create volume without exposing large gaps between sections. The individual curls appear glossy and spring-shaped, with many forming complete loops rather than loose waves.
That compact curl size is important. Larger curls would create a softer, more open pixie, while very tiny coils could make the crown look woollier and less sculpted. Here, the curl diameter sits between those two outcomes, creating a rounded cap of visible ringlets.
When ordering, ask what method creates the pattern. Human-hair coils may be formed using finger coiling, small rods, setting foam, gel, or a combination of methods. The answer matters because it tells you how the curls will behave after washing.
Questions worth asking include:
- Does the natural hair texture return to this coil size after washing?
- Is the pattern permanent, permed, or created with styling product?
- Can the unit be refreshed with water and foam?
- Will the crown expand significantly in humidity?
- How much shedding should be expected when separating the coils?
A heavily coated unit can look impressive in photographs but become stiff or flaky after a few wears. Request a short video in which the seller lightly presses and releases the crown. The curls should move and recover rather than remaining fixed like molded plastic.
The Sculpted Front Hairline
The front carries a row of narrow baby-hair waves extending from the forehead area toward the temple. These are not random strands brushed downward. Their spacing and direction have been planned to create a continuous hairline pattern.
The front waves also perform a practical job: they help disguise the boundary where the lace meets the skin. On a short wig, that boundary is more exposed because there is no long fringe available to cover it.
The hairline should be examined for three things:
Density transition: The front should begin lighter and gradually become fuller. A dense wall of hair at the lace edge will immediately read as a wig.
Wave spacing: The curves should feel related without appearing mechanically identical. Overly perfect repeated loops can look stamped onto the forehead.
Product buildup: Baby hairs need hold, but too much gel can darken the lace and make the front appear painted.
Ask the maker whether the edges are shipped already laid and which product was used. You will eventually need to recreate the pattern after washing, sleeping, or humid weather. A seller who offers a short maintenance clip can save you considerable trial and error.
The Twin Curved Temple Lines
Two narrow curved lines sweep backward through the right temple area. Their shape follows the contour of the side rather than cutting across it at a harsh angle.
The double-line placement works because the crown already contains a great deal of texture. A more complicated pattern could compete with the coils and the front waves. These two curves add contrast while leaving enough dark hair between them to keep the design readable.
The main challenge is consistency. Each line must maintain a similar width from beginning to end, and the space between the two curves should remain balanced. A line that becomes too wide can resemble an accidental bald patch. A line that is too faint may disappear once the wig shifts or the surrounding fibres move.
Ask whether the lines are created through ventilation spacing, fibre removal, trimming, or a combination of methods. Also request photographs from both sides. A unit may look impressive on its featured side while the opposite temple remains bulky or unfinished.
Unlike natural hair, the line will not grow out, but its contrast can weaken if product residue collects in the gap or nearby fibres fall across it. A small edge brush and pointed tail comb can help reposition those strands without widening the design.
The Tapered Side Construction
The side appears considerably shorter than the crown and transitions gradually toward the lower temple. That graduation is what allows the wig to imitate a short haircut rather than a uniformly curly cap.
A convincing tapered unit needs more than shorter fibres. The density must also reduce as the hair approaches the lower side. If the maker simply cuts a thick section very short, the result can look dark, heavy, and helmet-like.
Request side-profile photographs under bright, neutral lighting. Look for:
- A gradual change from crown curls to shorter temple hair
- No abrupt shelf between long and short sections
- Even coverage without empty patches
- A side shape that follows the head rather than projecting outward
- Line details that remain visible without excessive scalp exposure
The photograph suggests careful density placement, but buyers should still confirm whether the displayed piece is the exact unit for sale or only a reference model.
The Lace And Knot Area
The front lace extends well beyond the styled hairline, giving the installer a generous cutting margin. It appears fine and translucent in the photograph, though lighting can make lace look thinner than it is.
The photograph alone cannot confirm whether the material is HD lace, Swiss lace, or another transparent lace type. It also cannot prove that every knot has been bleached. Both points should be verified directly with the seller.
Ask for an unfiltered close-up of the lace placed against skin similar to your complexion. Lace labelled “transparent” can still leave an ashy cast on deeper skin tones, while lace that is too dark can create a visible shadow around the forehead.
Important questions include:
- What exact lace type is used?
- What lace tones are available?
- Are the knots bleached across the full front or only near the hairline?
- Is the lace pre-plucked?
- How far does the lace extend from temple to temple?
- Can the seller show the knot size before makeup or tint is applied?
Fine lace usually blends more easily but can also tear faster if handled roughly. The wearer should balance realism with durability, especially if the unit will be removed and reinstalled frequently.
Inside The Glueless Cap
The open interior shows a dark structured cap, several combs, and an adjustable band near the back. This arrangement is intended to secure the unit mechanically rather than relying entirely on adhesive.
Internal combs can be helpful, but placement matters. Combs positioned near the temples may provide stability, yet they can cause discomfort or tension if pushed repeatedly into the same area of natural hair. Buyers with weak edges, thinning hair, or a sensitive scalp may prefer to use the adjustable band and a wig grip instead.
The rear fastening allows the circumference to be tightened, but it cannot correct every sizing problem. A cap that is too large may still bunch at the crown. A cap that is too small can pull the lace backward and distort the sculpted hairline.
Measure the head before ordering:
- Begin at the centre of the natural front hairline.
- Run the tape around the head, passing above the ears.
- Continue around the nape.
- Return to the starting point without pulling the tape tightly.
Also measure front to nape and ear to ear if the maker accepts full custom sizing. Many mass-produced caps fall somewhere around 21.5 to 22.5 inches, but that range will not fit every buyer correctly.
Before You Pay
Send these questions before confirming the order:
- Is the hair human hair, synthetic fibre, or a blend?
- Can you recreate the same compact finger-coil size?
- Will the curls return after washing?
- Can you reproduce both curved temple lines?
- Are the short sides hand-ventilated or cut from a dense base?
- What lace type and lace tone will be used?
- Are the knots bleached?
- Is the hairline pre-plucked?
- How many combs are inside the cap?
- Does the unit include an adjustable strap or elastic band?
- Can the cap be made to my measurements?
- Will the wig arrive fully styled?
- Can you provide a final video before shipping?
- What is the return or alteration policy?
- How should the baby hairs be re-laid after washing?
Do not rely on a simple “yes, we can make it.” Ask the seller to repeat the specifications in writing so both sides are agreeing to the same unit.
Trimming And Positioning The Lace
Place the wig in its intended position before cutting anything. The carved side design and front waves must sit at the correct angle, so a small positioning error can make the temple line appear tilted.
Cut the lace in short, uneven motions rather than removing it with one long straight cut. Leave a narrow margin at first. More lace can be removed later, but a lace edge cut too far back cannot be restored.
Avoid cutting directly through the baby hairs. Separate them from the lace with a fine comb, pin them backward, and trim underneath. If the wearer has never installed a lace pixie before, paying a stylist for the first fitting may be worthwhile. Once the lace has been shaped to the hairline, later installations become easier.
A lace tint or light layer of foundation may help match the material to the skin, but excessive makeup can collect around the knots and make the front look dusty. Use the smallest amount necessary.
Maintaining The Coils And Side Details
Do not comb through the crown with a fine-tooth comb. That will pull apart the finger coils and increase the volume far beyond the intended silhouette.
For routine refreshing:
- Mist the hair lightly with water
- Apply a small amount of curl foam or lightweight setting product
- Re-form loose sections around a finger
- Allow the unit to dry on a stand
- Separate only the coils that have merged together
- Keep heavy oils away from the lace and carved lines
Wash the unit only when product buildup, sweat, or odour makes it necessary. Use lukewarm water and avoid rubbing the curls against one another. Press the cleanser through the hair gently, rinse in the direction of the curl pattern, and reshape the crown before drying.
The front waves will need separate attention. Use an edge brush and a small amount of holding product, working in sections rather than trying to recreate the entire hairline at once.
Store the wig on a compact head form so the sides do not collapse inward. Cover it loosely with a satin bag or hair net after the curls have fully dried.
Search Terms
finger coil pixie wig with twin curved lines · jet black coily lace pixie human hair · glueless short curly fade wig · sculpted baby hair pixie lace wig · barber line design wig for women · tapered coil crown wig with combs · custom HD lace pixie wig with side pattern · where to buy a short finger coil wig
Final Thoughts
What makes this unit valuable is not the black colour or the short length by itself. Its appeal comes from several small jobs working together: compact coils across the crown, a lighter hairline, wave-shaped baby hairs, gradually shortened sides, two controlled temple curves, and a cap built for adjustable wear.
Remove the side lines and it becomes an ordinary coiled pixie. Remove the tapered density and it begins to resemble a rounded curly cap. Remove the front detailing and the lace becomes much harder to disguise. The realism depends on the combination.
That also explains the higher custom price. The buyer is paying for hours of placement, shaping, and finishing rather than expensive colour processing. It can be a strong purchase for someone willing to maintain the edges and re-form the coils occasionally.
Before ordering, make sure the seller can show similar work from more than one angle. A maker who can reproduce the crown but not the temple details is not producing the same wig. Secure the specifications in writing, confirm the cap measurement, and request a final video before the unit is shipped.